

Clean Data, Clear Insights: Your Essential Guide to Filtering Out Internal Traffic in GA4
Imagine making important marketing decisions based on a 5% conversion rate—only to realize later that half of those “sessions” were from your own team testing pages, QA requests, or checking content.
Internal traffic pollution is one of the most common analytics errors. It inflates engagement time, skews conversion rates, and damages the accuracy of your customer insights.
The solution: GA4’s Data Filters system, designed to identify and exclude employee traffic from reports—without deleting data until you're confident everything works.
How GA4 Handles Internal Traffic (Different From Universal Analytics)
GA4 introduced a two-stage system:
- Define Internal Traffic — Identify traffic sources such as office IPs or agencies.
- Activate the Filter — Use Testing mode before permanently excluding that traffic.
The Safety Feature: Filter States
GA4 offers three internal traffic filter states:
- Testing: Traffic is tagged but still appears in reports so you can verify setup.
- Active: Traffic is excluded from reporting permanently (recommended after validation).
- Inactive: GA4 ignores the filter entirely.
Pro tip: Always begin with Testing mode to avoid excluding real customer sessions by mistake.
Step 1: Define Internal Traffic (Add Your IP)
- Go to Admin in GA4.
- Click Data Streams under Data collection & modification.
- Select your Web data stream.
- Scroll to Google Tag → Configure tag settings.
- Select Define internal traffic.
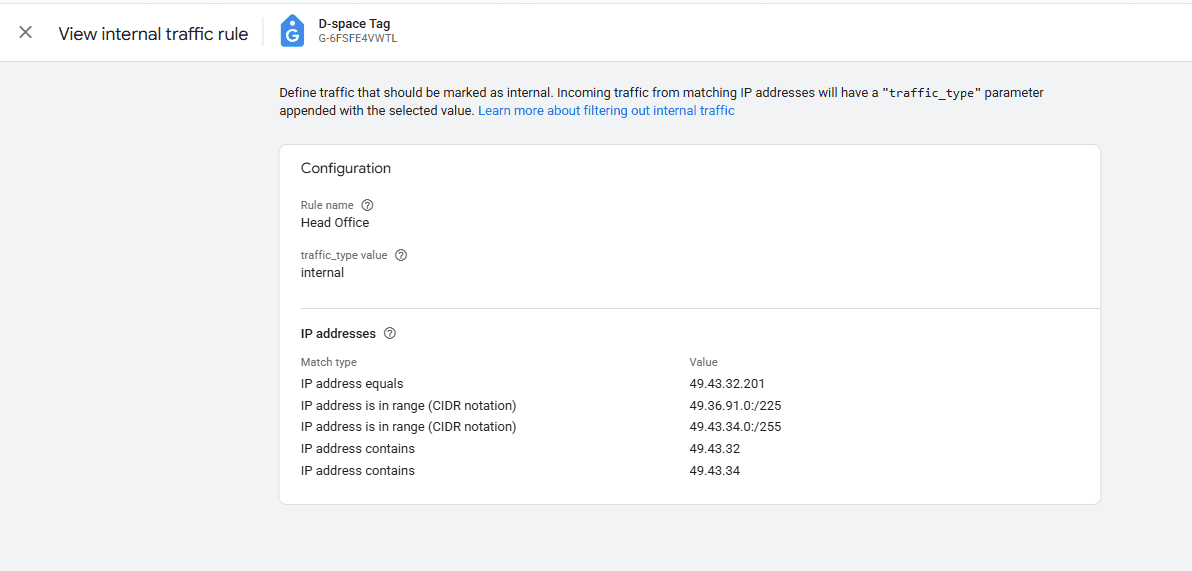
Now create your rule:
- Rule Name: Example: “HQ Office IP” or “Remote Team - Sarah”.
- traffic_type: Leave default:
internal. - IP match type:
- Equals — single address
- Begins with — shared addresses
- CIDR notation — enterprise ranges
Save the rule. Repeat if you have multiple office locations or remote teammates.
Step 2: Create & Enable Your Data Filter
- Return to Admin.
- Open Data Filters.
- Select the automatically generated Internal Traffic filter (or create one).
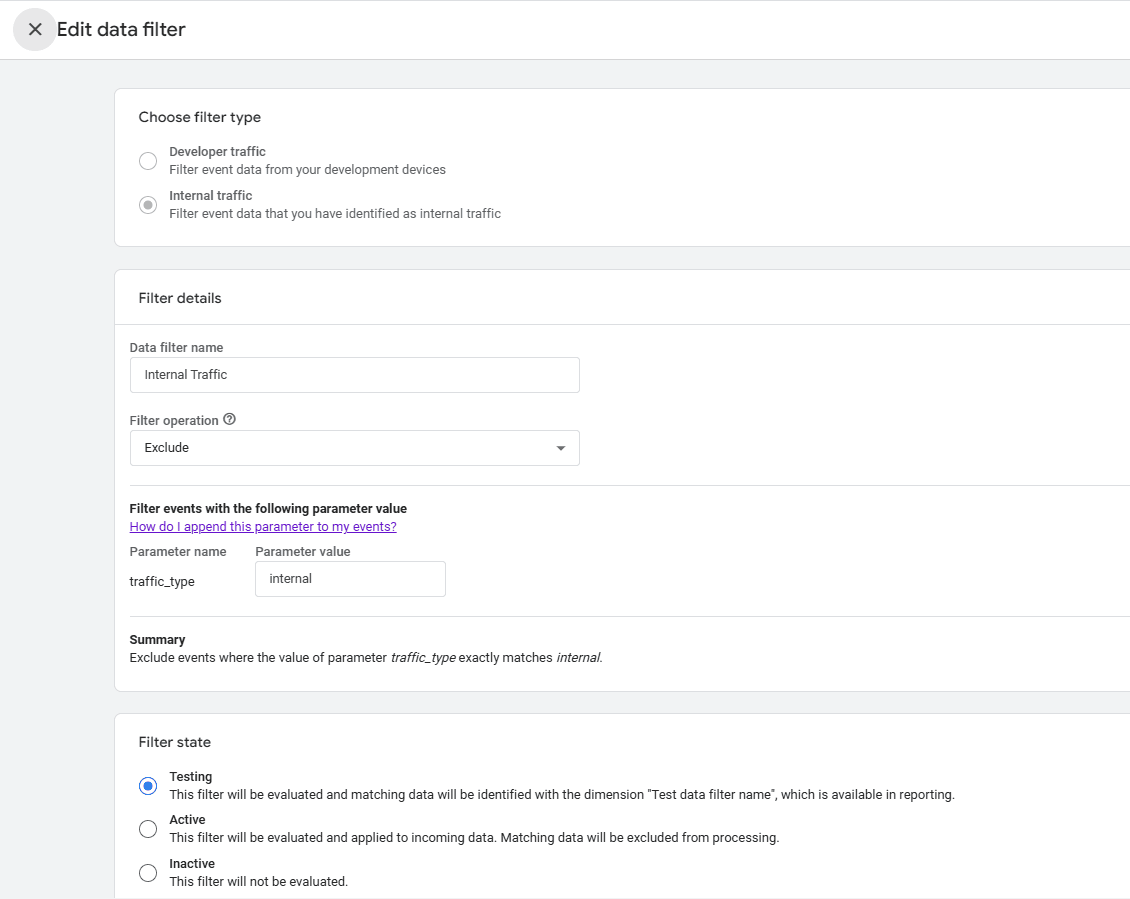
Set the filter state to:
- Testing → Required before enabling Active mode
Click Save.
Step 3: Verify With DebugView (Critical)
Before permanently filtering data, ensure GA4 recognizes you as internal traffic.
- Visit your site from the IP you configured.
- In GA4, go to Admin → Data display → DebugView.
- Click any
page_viewevent. - Look for the parameter: traffic_type: internal
If you see it → setup is correct.
If not → check IP format (IPv4 vs IPv6 mismatch is common).
Step 4: Activate the Filter
Once validated:
Admin → Data Filters → Internal Traffic → Change state → Active
This permanently removes internal data going forward.
How Your Data Changes After Activation
- Standard Reports: More reliable conversion & traffic analysis.
- Explorations: Cleaner funnel and audience insights.
- Realtime: Still shows internal traffic, labeled separately.
Note: Filters are not retroactive. Past data remains unchanged.
Advanced Scenarios
You can define additional categories of internal traffic:
traffic_type = internal
traffic_type = agency
traffic_type = developer
This allows filtering by role—for example, excluding developers but analyzing agency testing sessions.
Remote Teams With Dynamic IPs?
If your team uses changing IPs, alternatives include:
- Static VPN
- Cookie-based filtering
- Browser extension to set identifiers
Troubleshooting
- Still seeing internal sessions? Filter might still be in Testing mode.
- Traffic missing? Filter may have been activated before validation.
- Delayed results? Filtering effects take 24–48 hours.
Final Takeaway: Protect Your Data Confidence
Setting up internal traffic filtering ensures:
- Accurate metrics
- Reliable decision-making
- Clear marketing attribution
Clean data = better insights = smarter decisions.


